Welcome to 2021, where virtually everyone uses their phone to take the majority of their photos. Do NOT apologize for that! Our smartphone cameras have become so sophisticated, it is entirely possible to take pictures you’d enlarge and frame using the camera that’s always in your pocket!
If you feel like other people’s photos are better than yours, try my 4 easy tips, and I promise you’ll start to see immediate improvement!
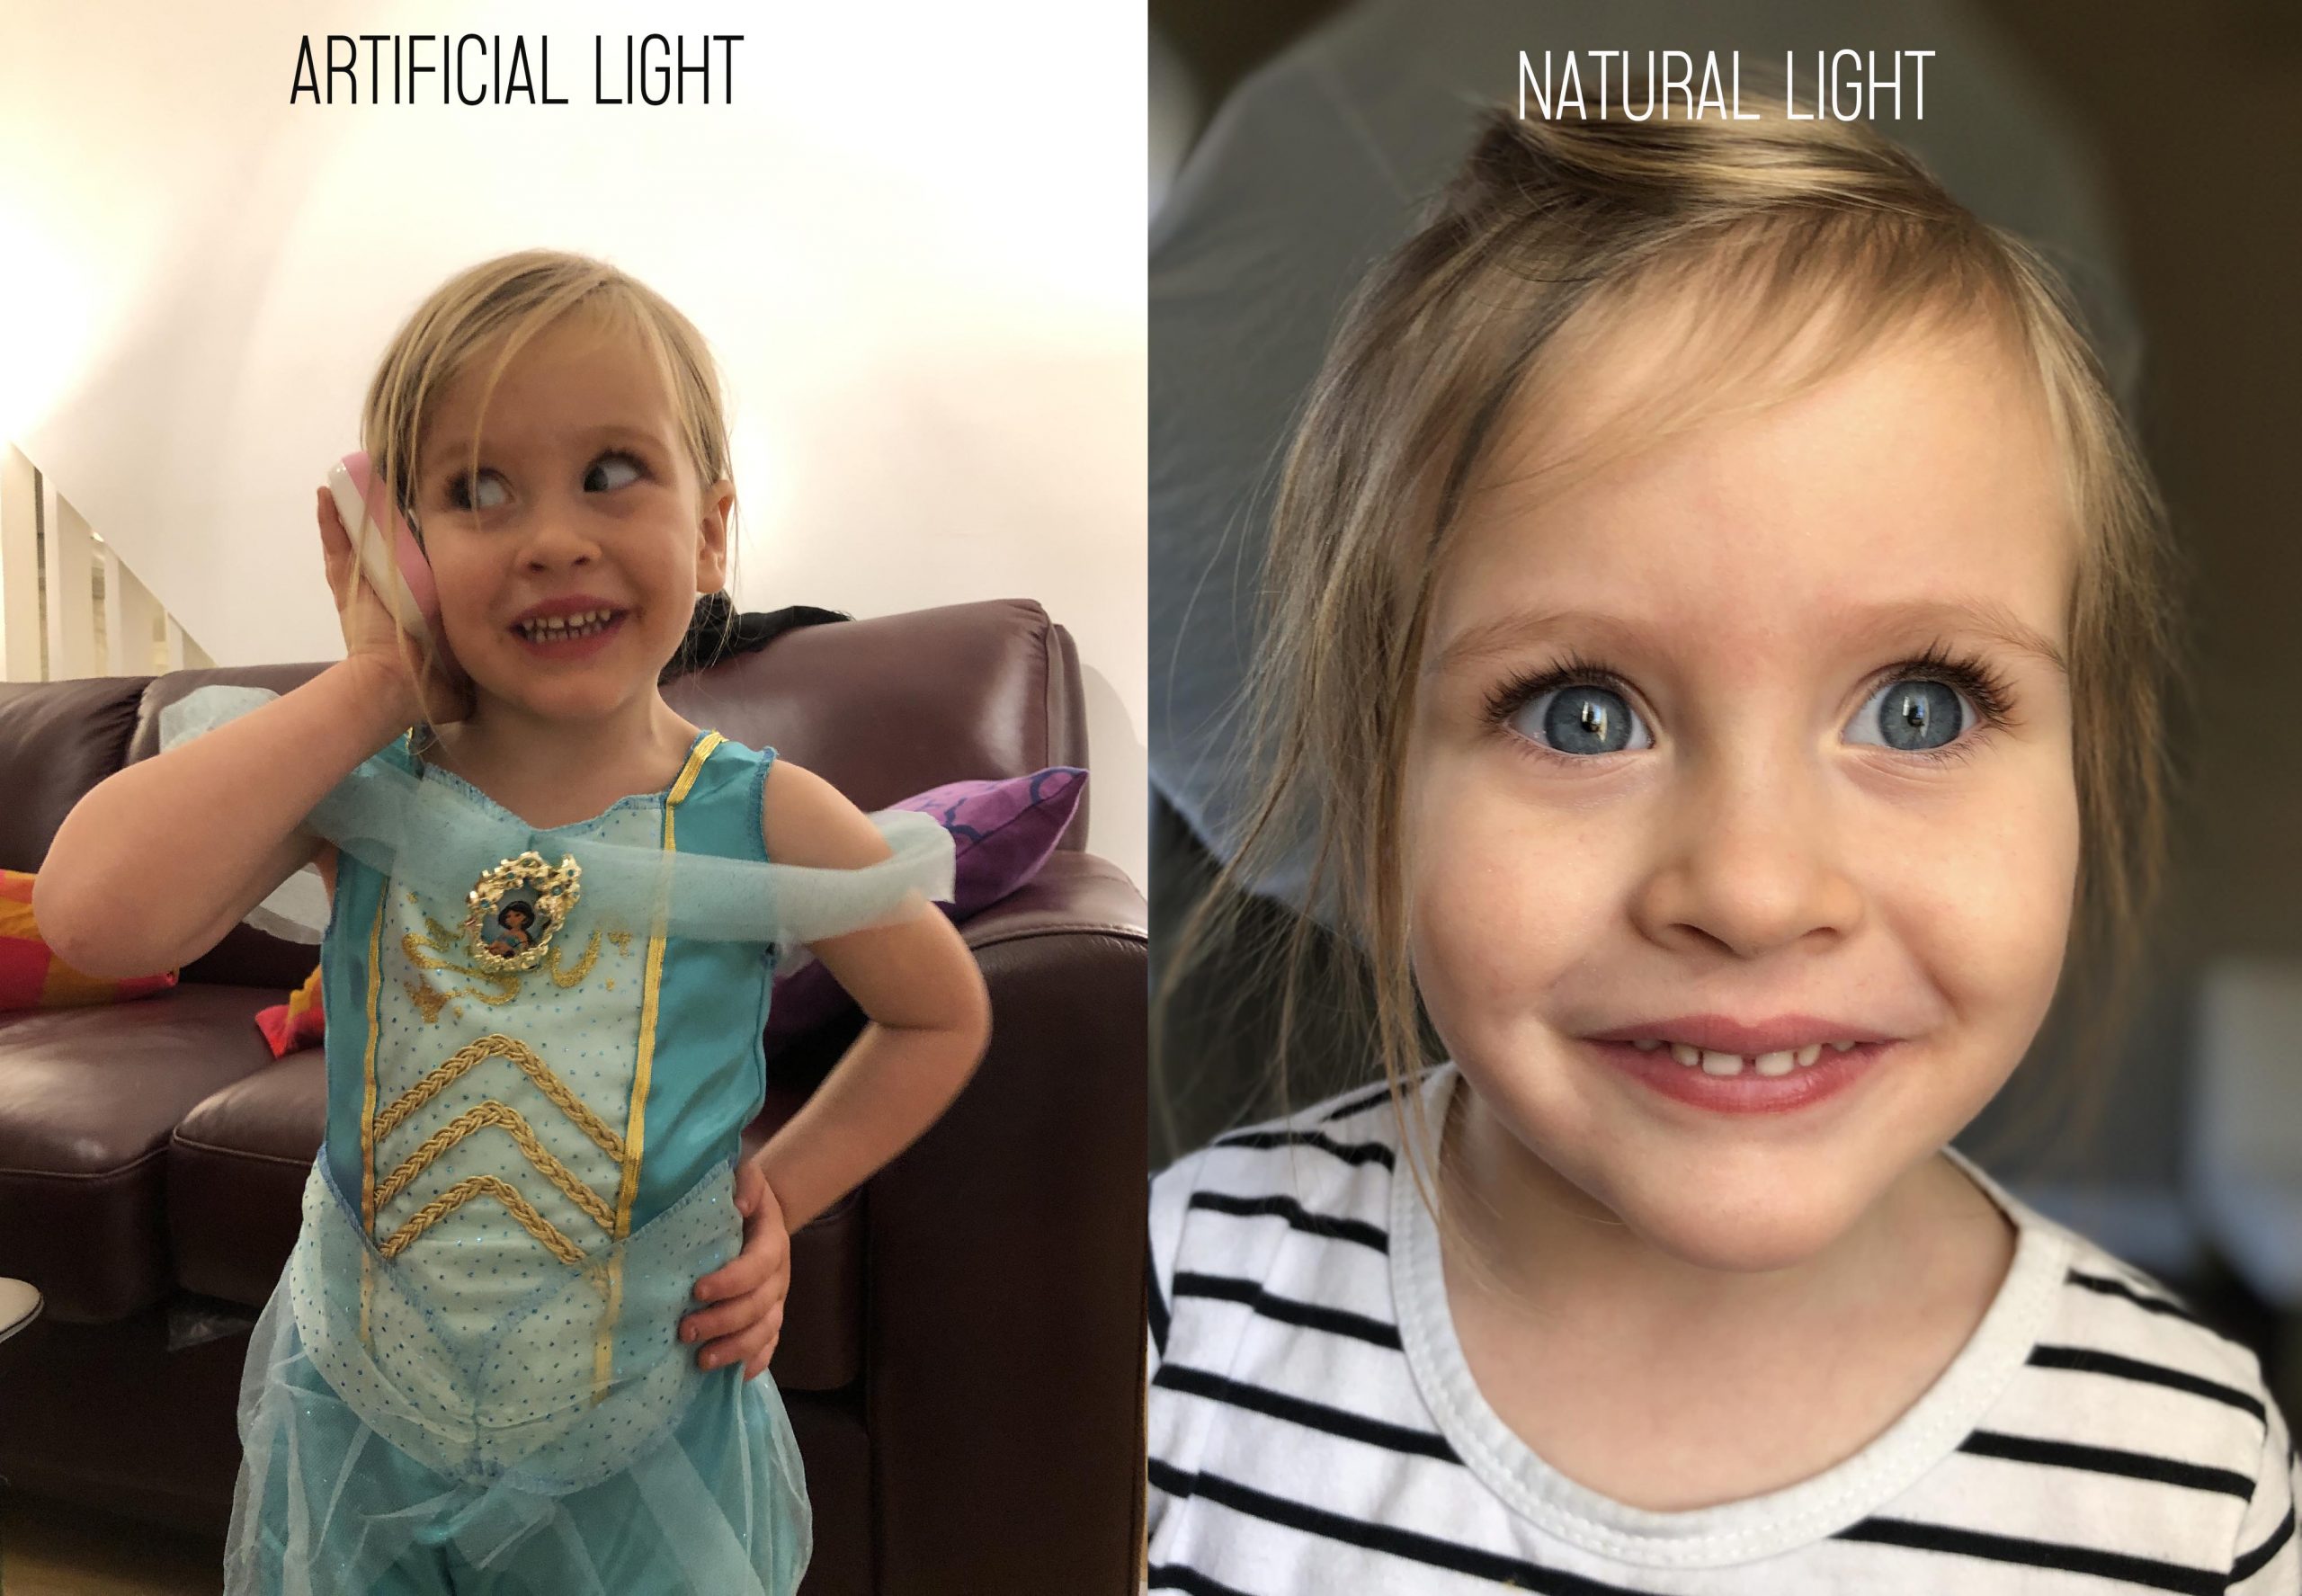
1. USE NATURAL LIGHT
First thing’s first, turn off the ceiling lights! That is hands-down, the most unflattering way to illuminate your image. Table lamps are a little better, but most give off a yellow glow that will muddy skin tones or cast a retro vibe you may not be looking for. And turn your phone’s flash to OFF so that it only comes on when you want to turn it on. Direct flash on a subject isn’t going to create a flattering image, so only use it when you want to document something, not when you want to create a gorgeous picture. So, my best advice is to TURN OFF ALL the artificial lights and look for a window or a doorway where you can allow natural light to illuminate your subject. In this example you can see that her skin tones are much brighter and true to life with natural light. Also note the sparkle in her eyes with natural light.
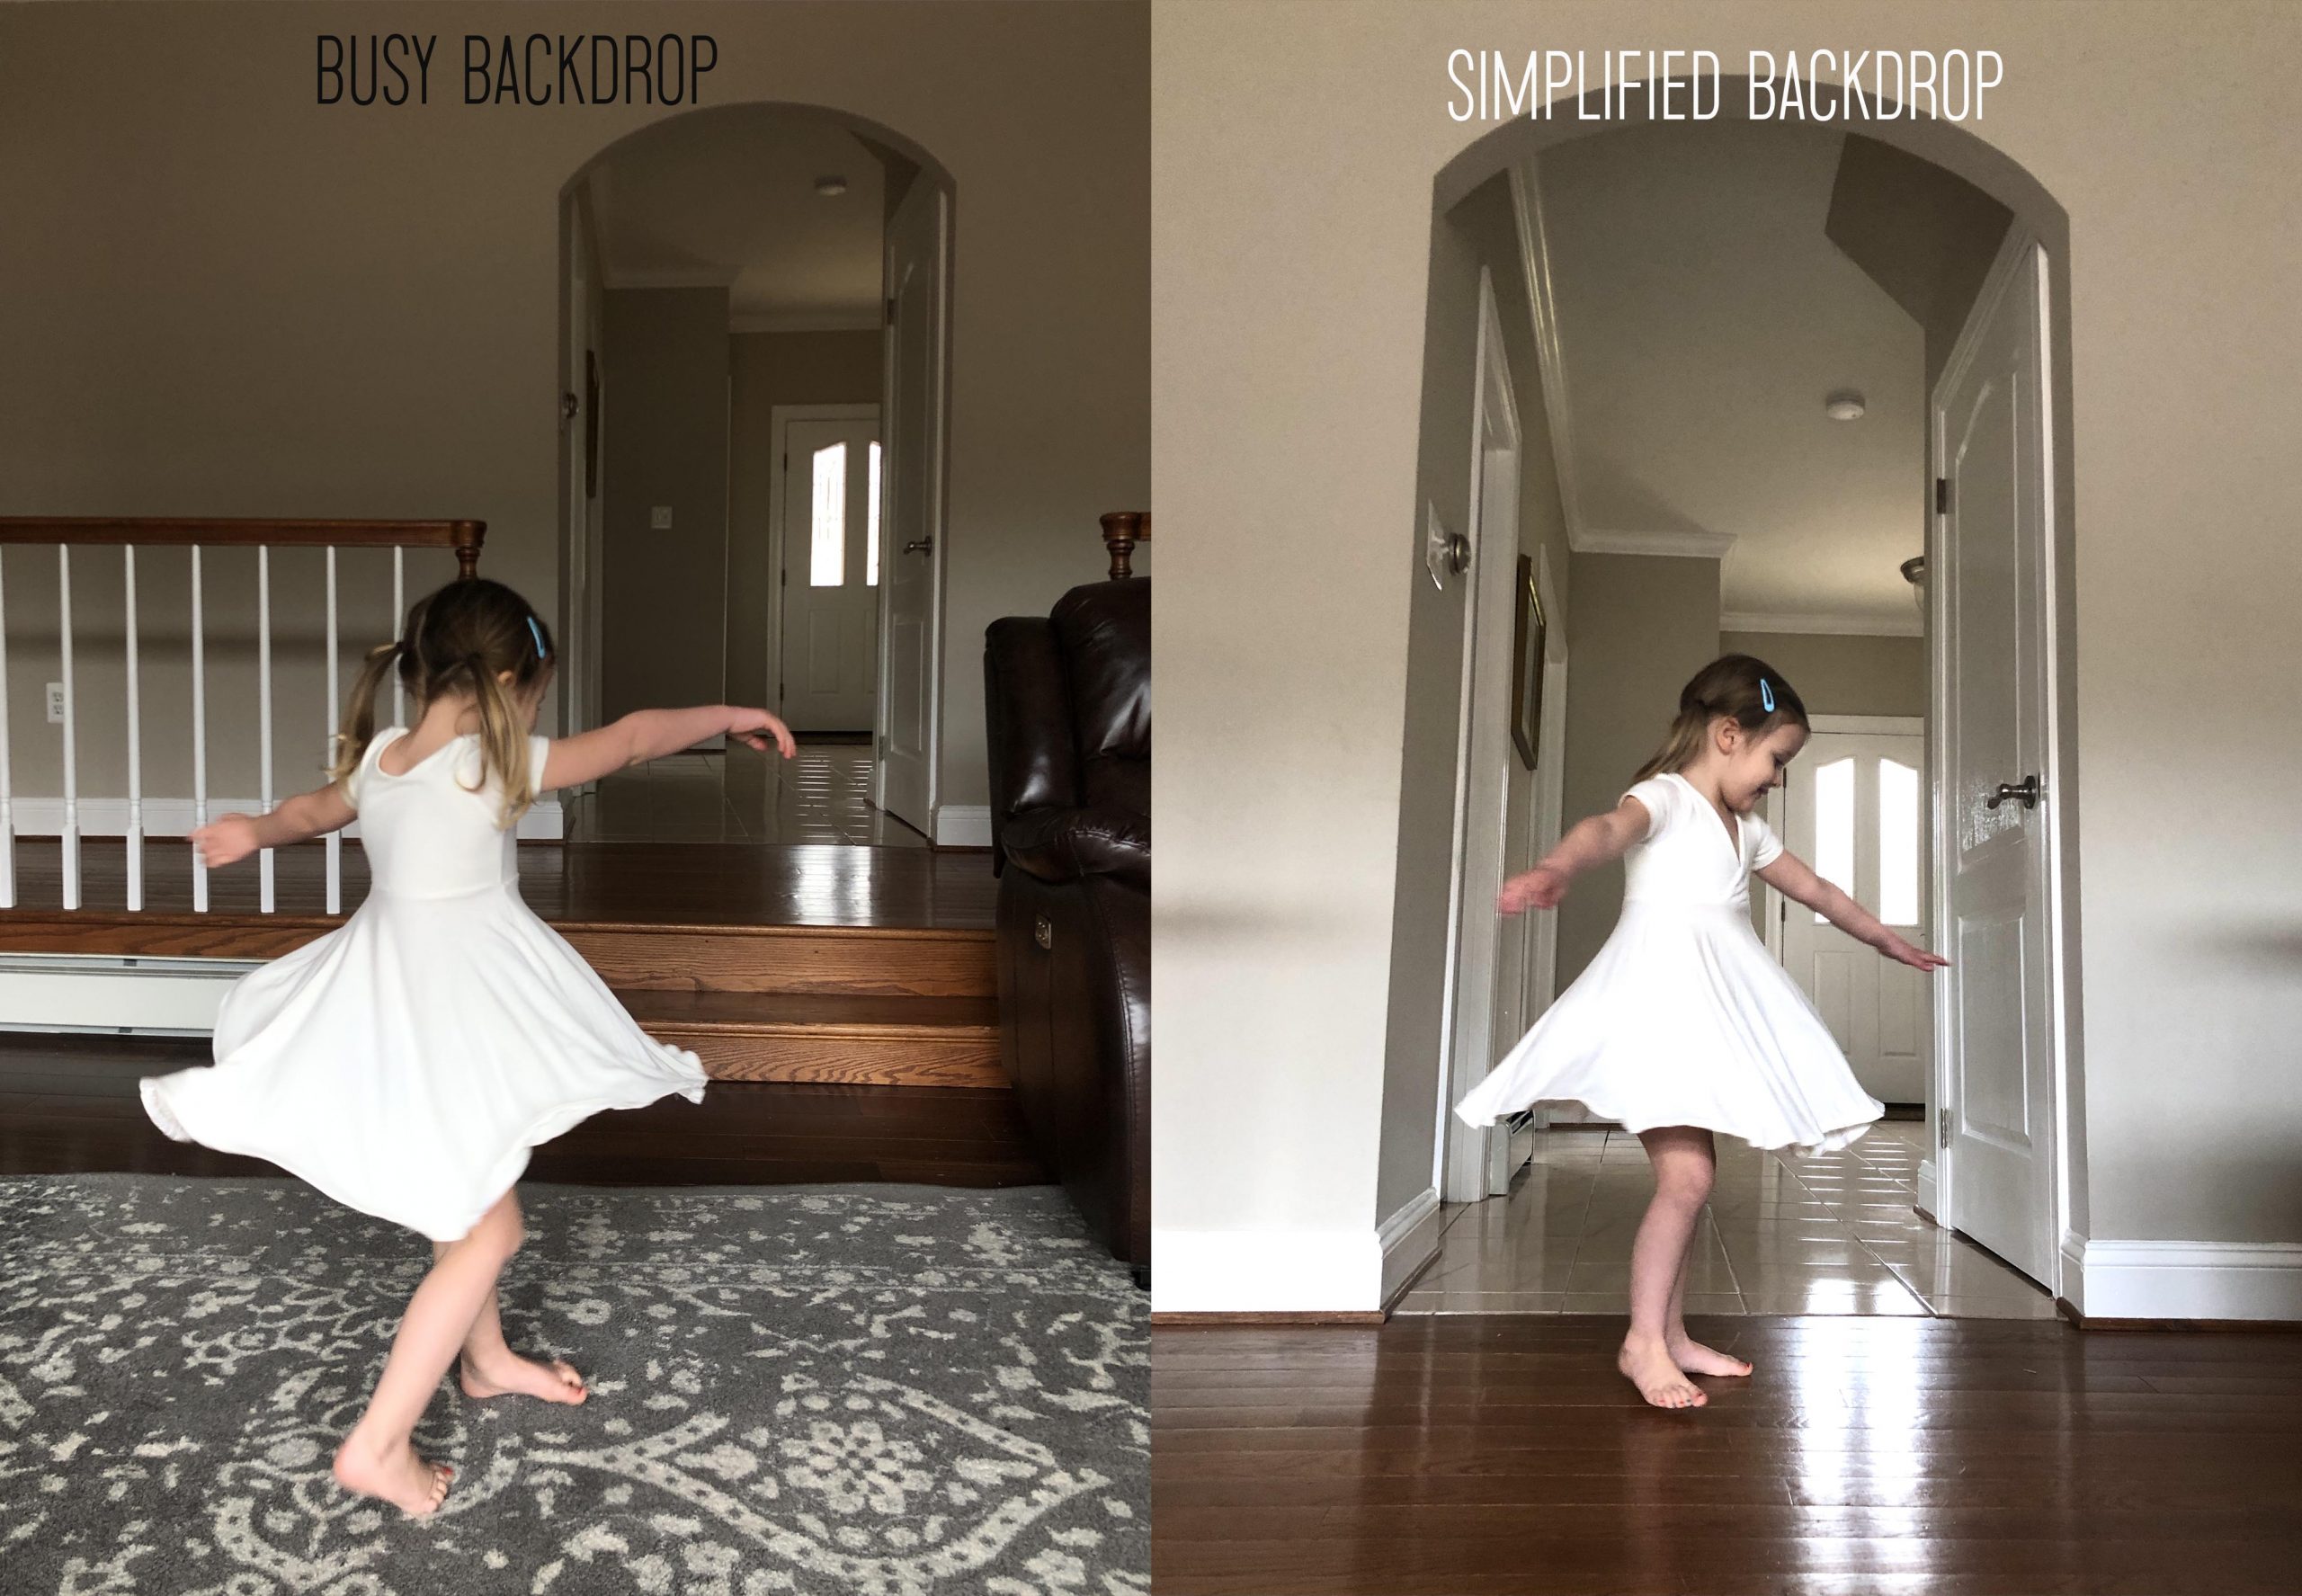
2. SIMPLIFY THE SCENE
Busy or cluttered backdrops will take away from the impact of your image. Isolating your subject is a great way to make a photo look more polished. People who take their photography seriously will often set the stage for a photograph. You can’t always expect to pickup your phone and take a great picture from wherever you are. Sometimes you need to move yourself or your subject (or both) to get the best backdrop for your image. Pay attention to what’s in your frame and remember that what’s included in your viewfinder is always in your control. Take this example of the tiny twirler. The image becomes much more powerful when she is dancing under the arched doorway without the rug, couch or railing in the frame. Moving the subject a few feet made all the difference.
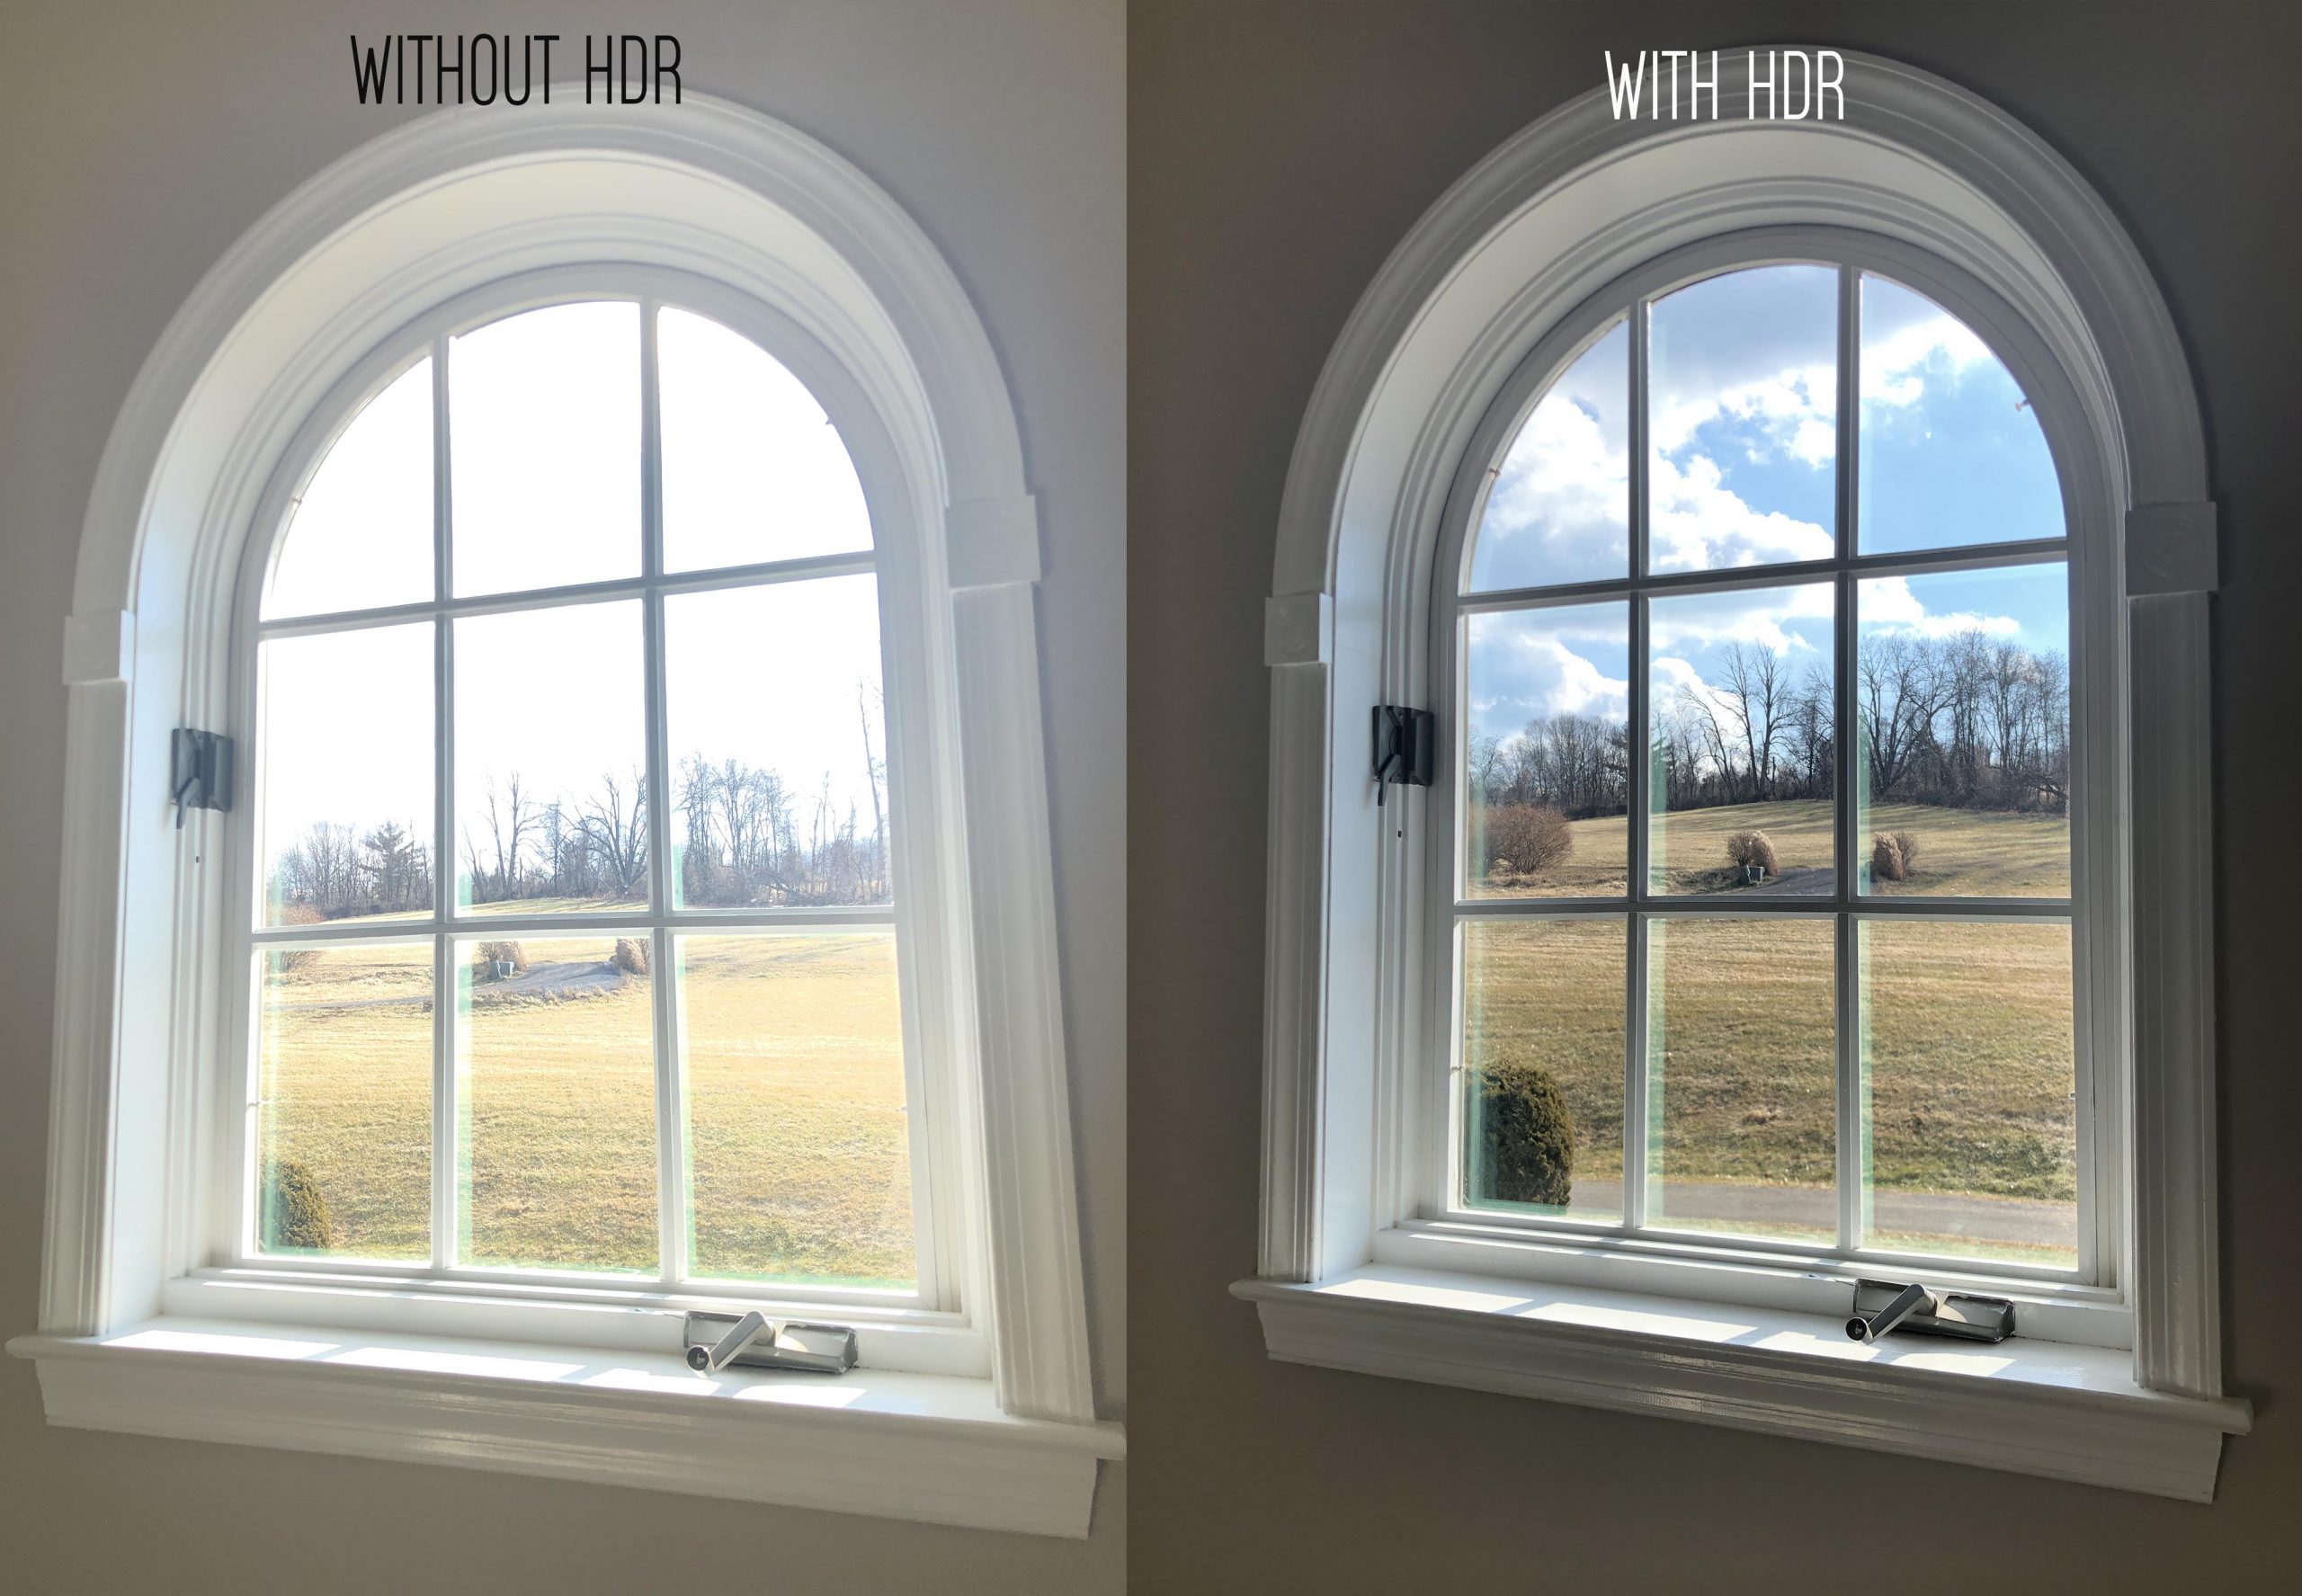
3. USE HDR
I love using the HDR tool (high dynamic range) when I’m taking a photo that has two very different lighting scenarios. I can preserve detail that would otherwise be lost without this tool. You can typically find this function within the camera app that your phone comes with. HDR is especially useful when you’re photographing something through a window or outdoor scenes that are bright. Pictures of sunsets can be greatly enhanced using this tool. You may otherwise lose all of the color and depth in a sky without turning HDR on, so give it a try and see the difference it makes!
4. EDIT YOUR IMAGES
The idea of photo editing intimidates a lot of people. Some think it will take a lot of time or that it’s overly complicated to learn. While I admit that it is an art form that takes years to perfect, you can most definitely begin editing your smartphone images well without knowing what you’re doing, and quite easily! The most powerful, user-friendly tool that photographers use to edit their images, Lightroom, is FREE to download to your phone! Editing is truly the secret sauce that will make a good image absolutely sparkle. The above examples haven’t been edited because I want you to see the difference you can make in your images BEFORE you get to the last step of editing. Now, I’ll show you just a couple of before and after pictures that were edited with ONE CLICK in the Lighroom app.
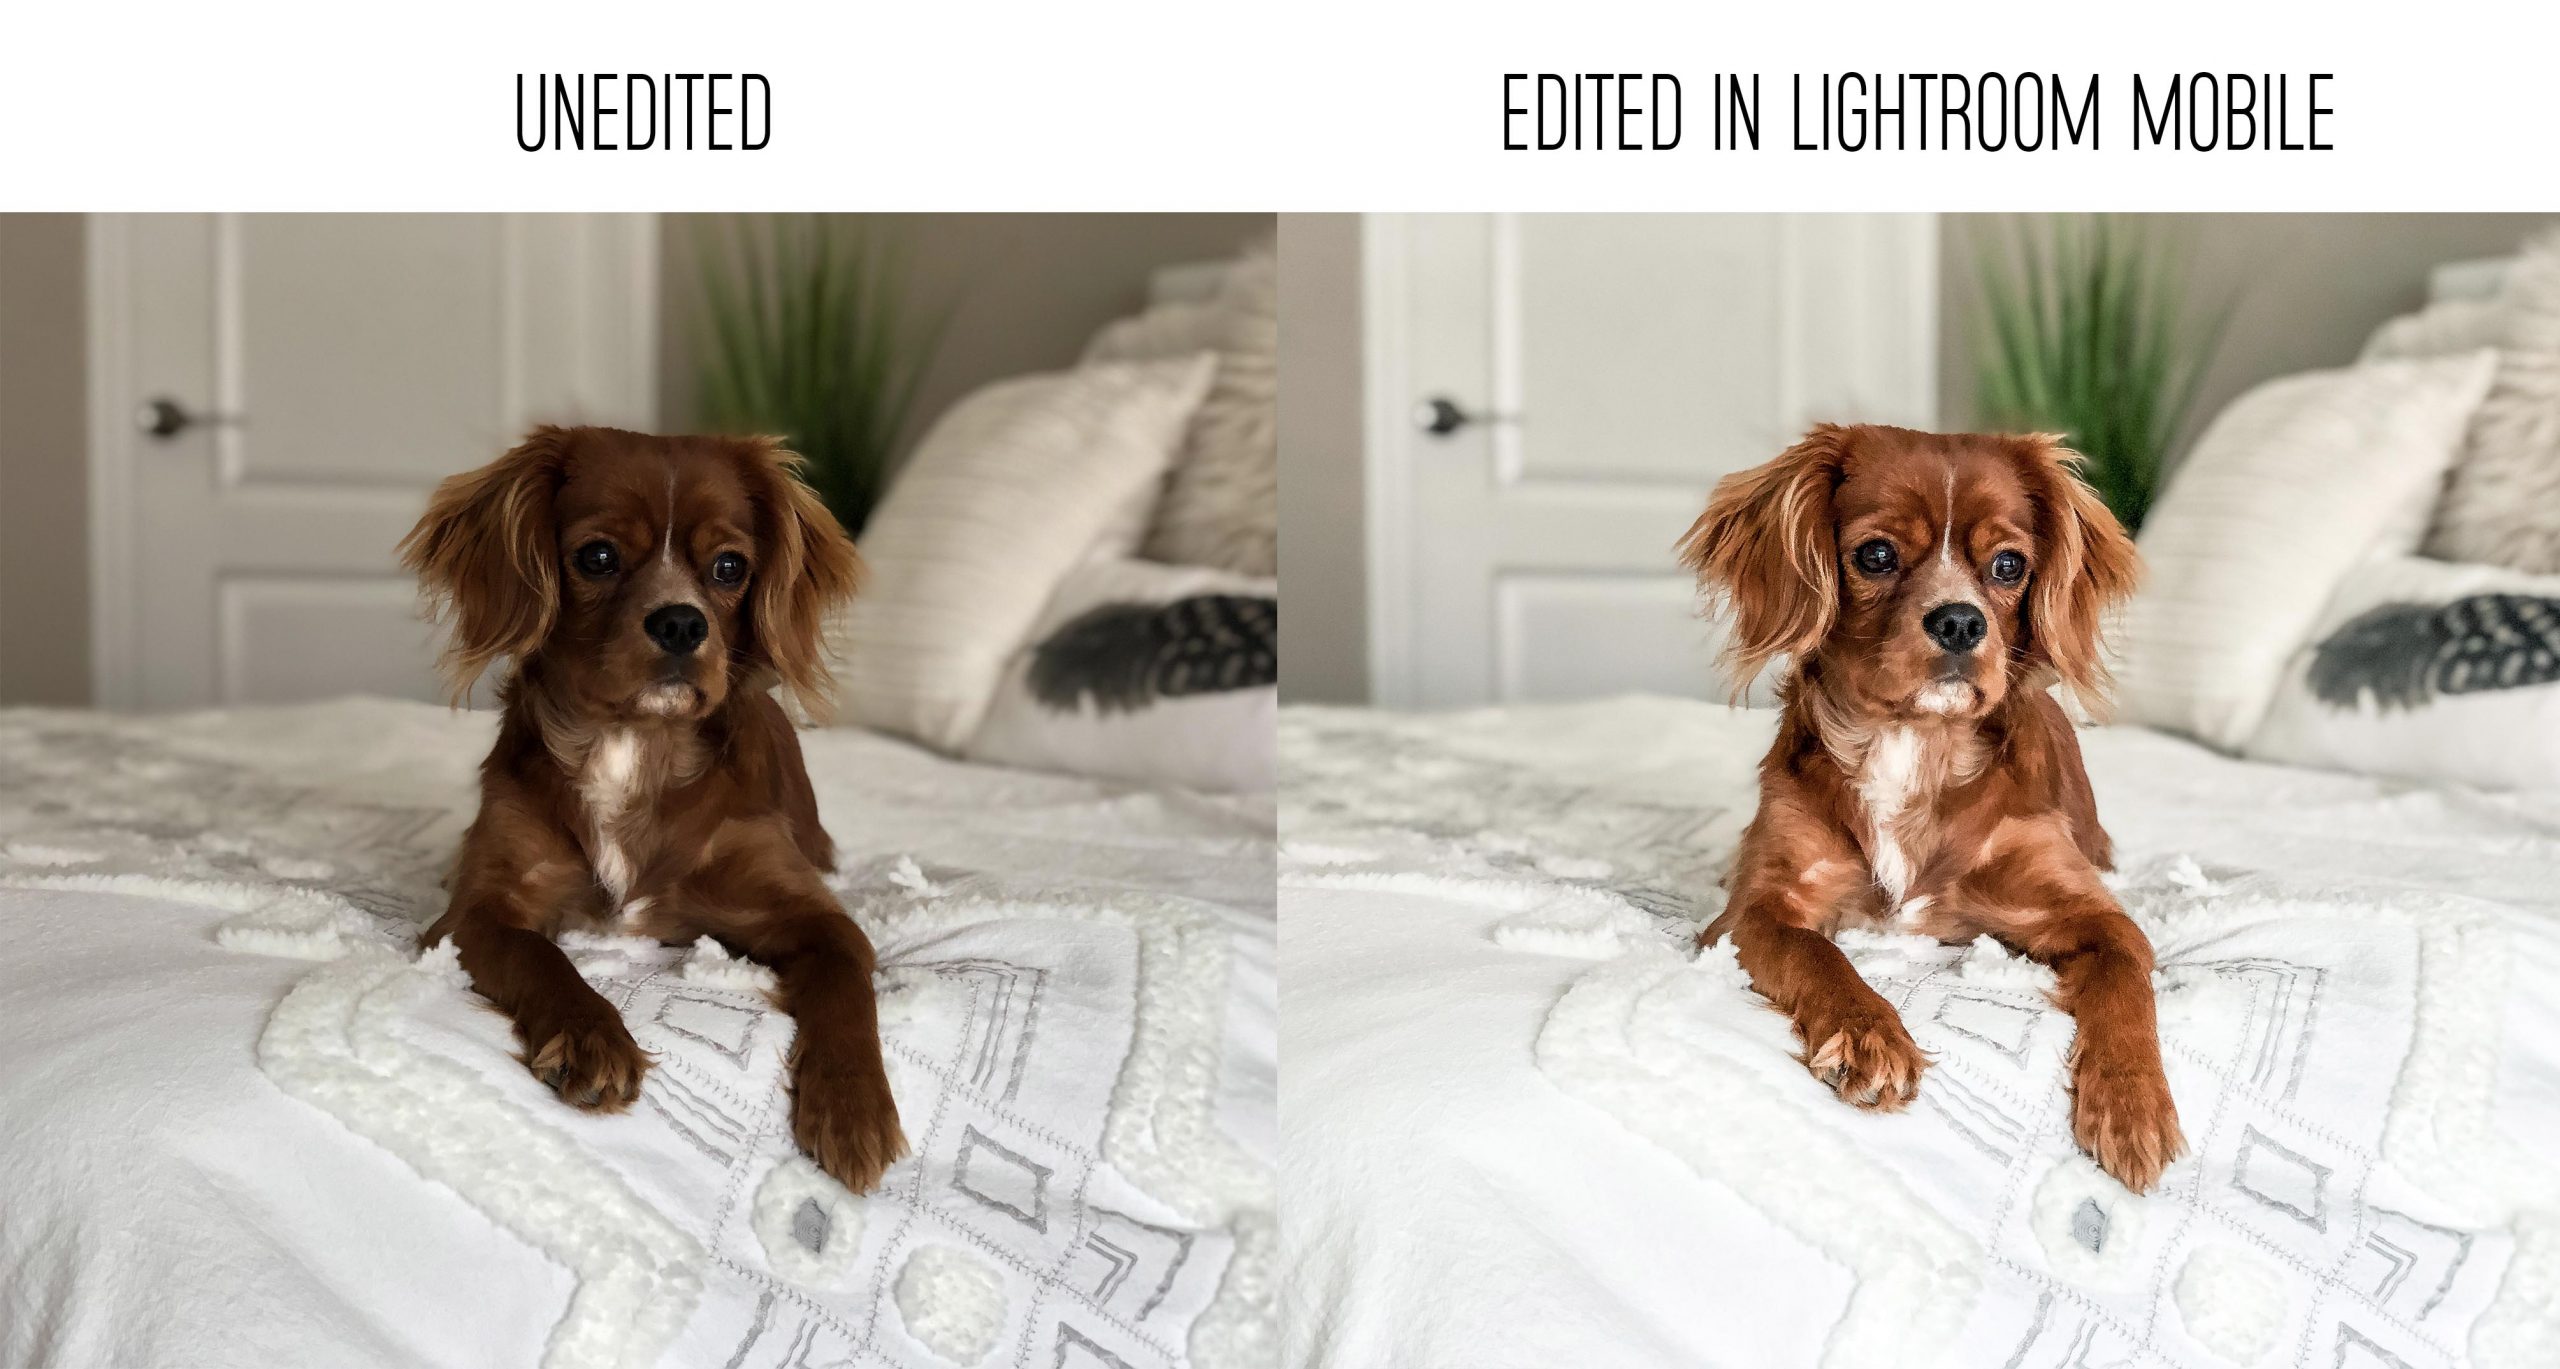
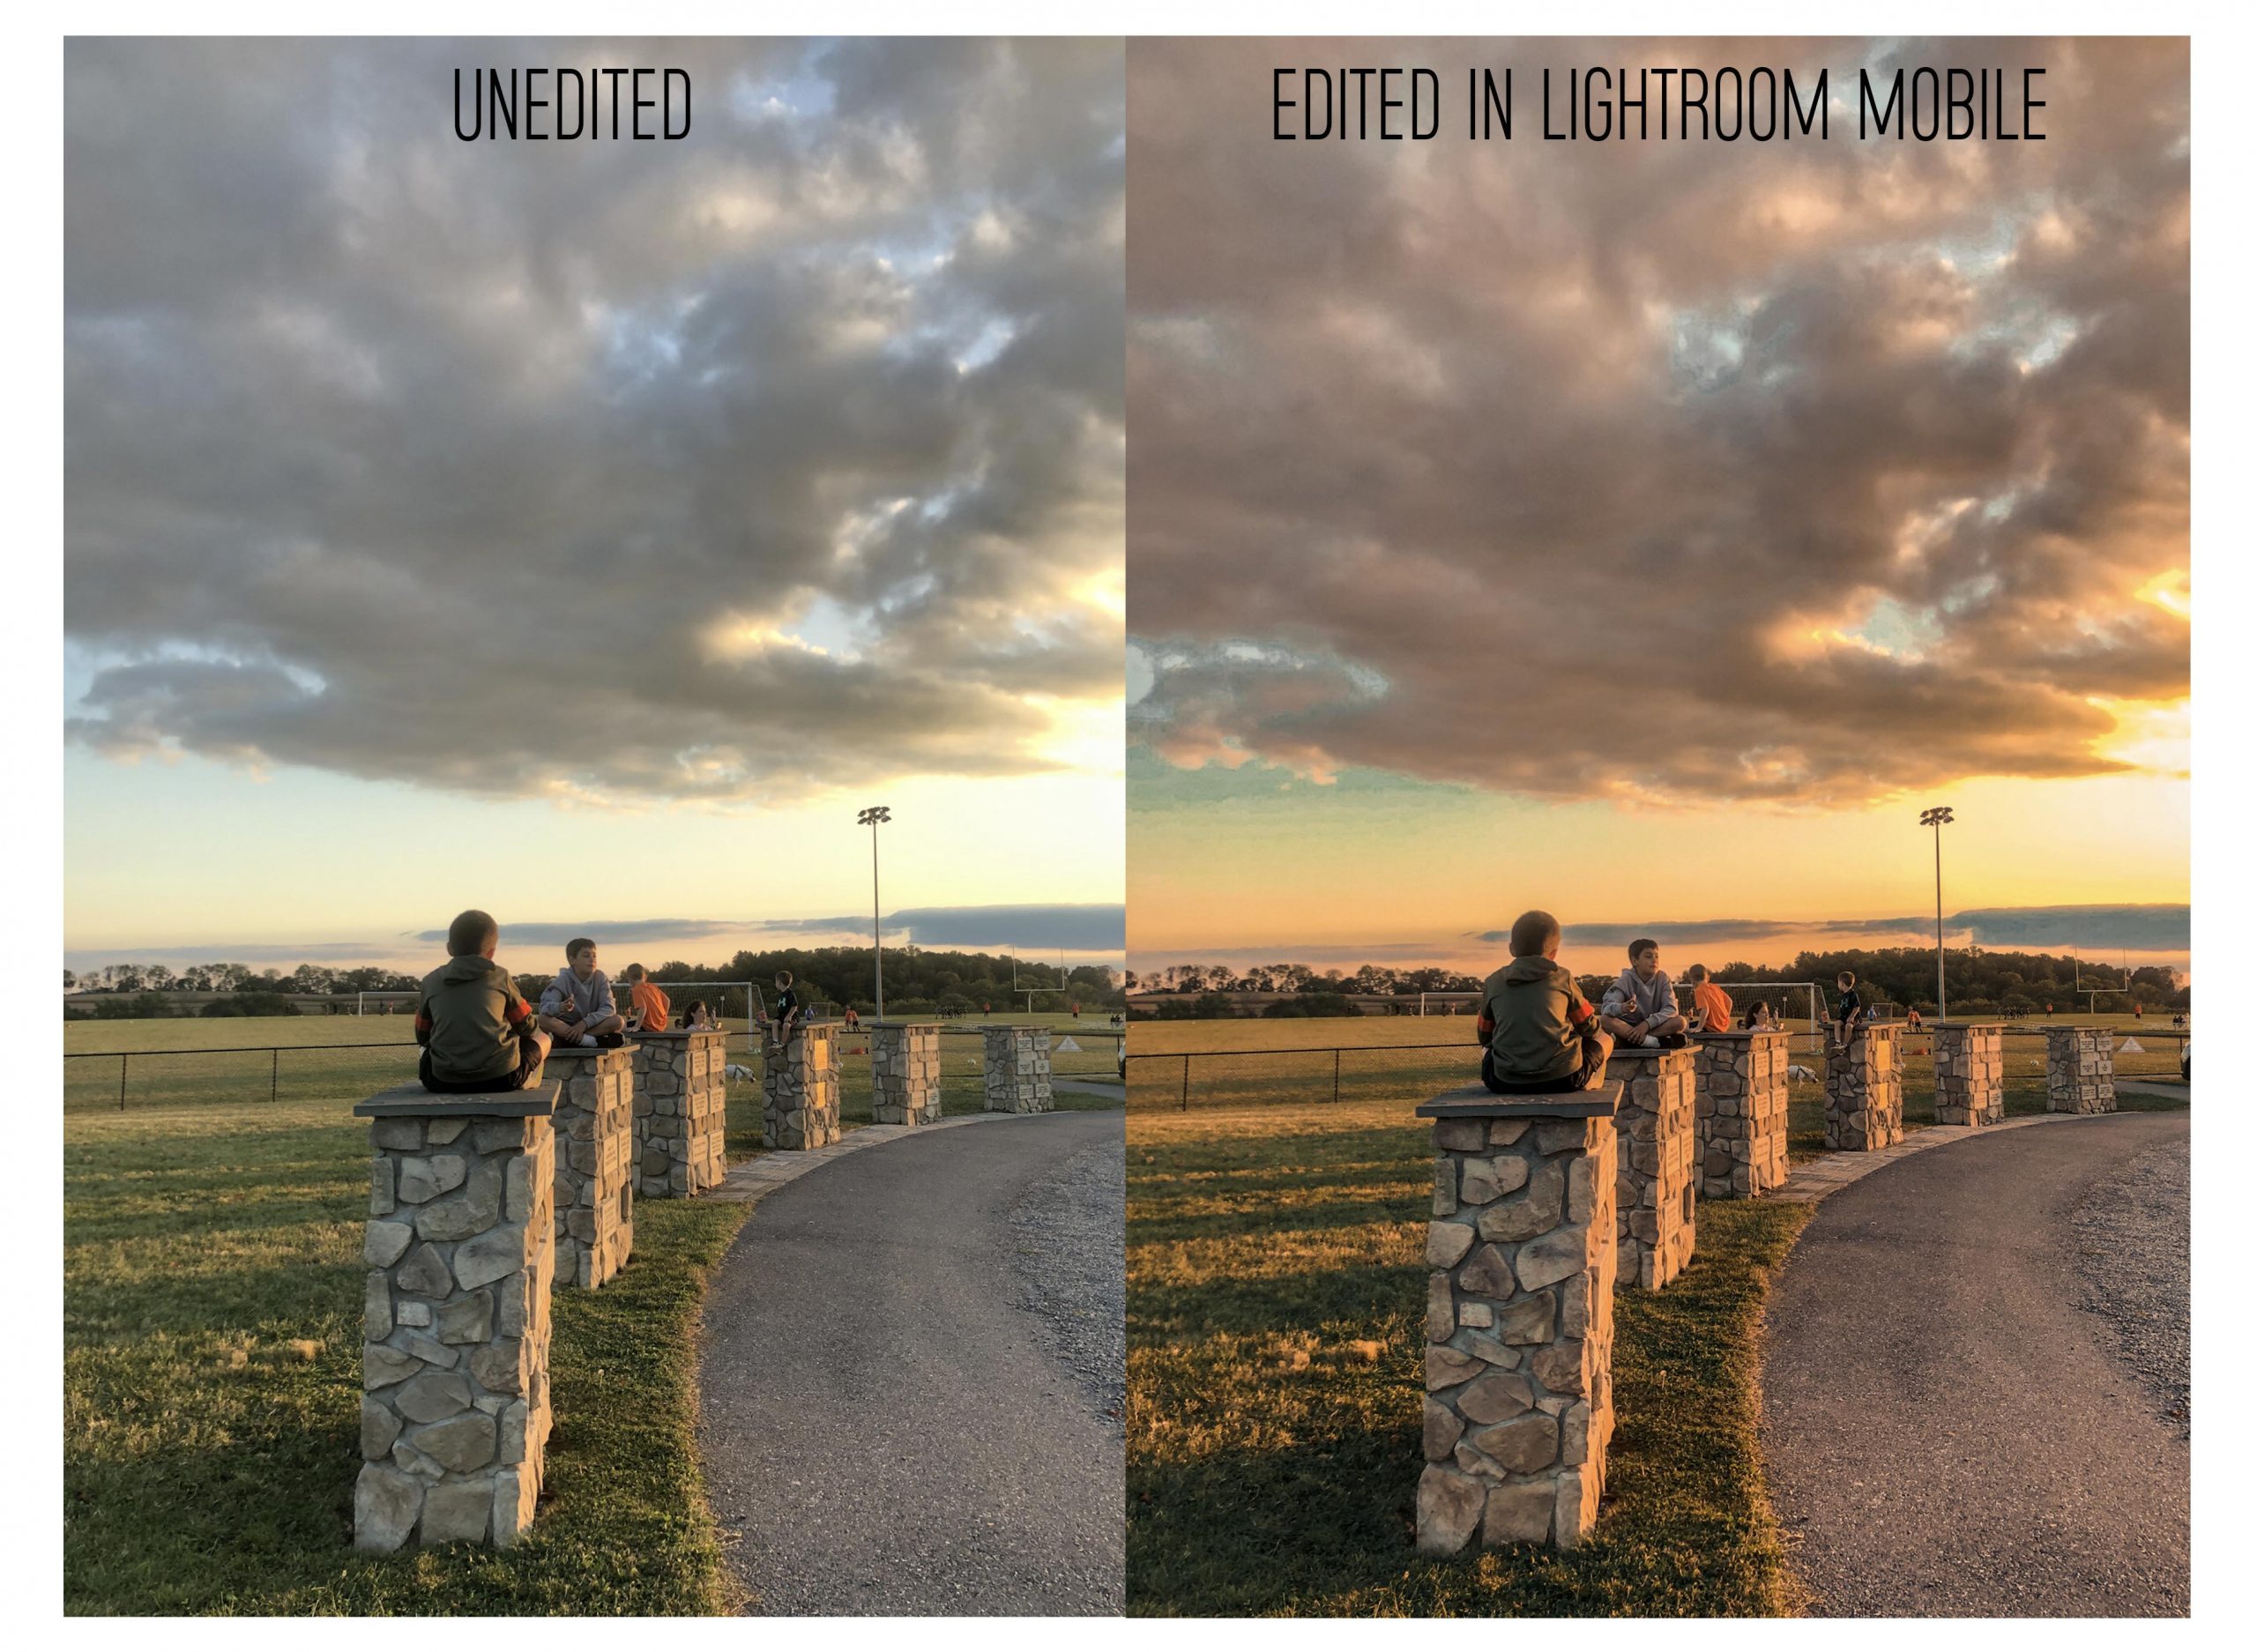
As you can see, the edited images have a more professional look and really POP out at you.
How can you get an edit like that in just one click?
The answer is PRESETS. A preset is an editing tool that you click on and it applies a number of different adjustments at one time to an image. Rather than spending hours tweaking all the various sliders there are in Lightroom, the preset takes care of all of the work for you and makes your picture sparkle!
I spent the better part of a year developing a pack of 7 mobile Lightroom presets to help my clients and students get a professional look with one click. And I’m going to give you one of my most popular presets for FREE so you can get started with applying professional edits to your images with one click!!
Just drop your email in the box below and you’ll get an email with the FREE preset and all of the detailed instructions right to your inbox!