i am pleased to announce that i’m starting a new section of my blog just for photographers! there is SO much to learn in the exciting and challenging world of photography, and my hope is to share some of the useful information and wisdom i’ve picked up along the way. in this detailed editing tutorial (which was recently featured on I Heart Faces), you will learn how to create creamy newborn skin in Lightroom 3.
Baby C slept like a champ for his newborn session, which resulted in tons of gorgeous images. The sweet little boy came to my home for our session, where I use a studio set-up with a mix of on and off camera lighting. This shot was taken using my 24-70 L lens, and my settings were ISO 100, 30 mm, f/2.8, 1/160sec. I edited this photo exclusively using Lightroom 3, which I use primarily for my simple, clean photo editing process.
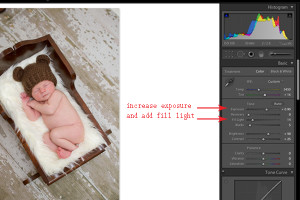
Here is the SOOC image. It is definitely underexposed, but not without plenty of potential! (on a side note, it is always best to capture your exposure as correctly as possible in camera, however there are moments (especially with children and babies) where the moment is so fleeting, you have to take what you can get!
Step 1 – Exposure
Since the image is pretty dark, I first adjust the exposure, adding almost 1 stop (.90) and add a little fill light (.14) to brighten it up.
Step 2 – Skin Tone
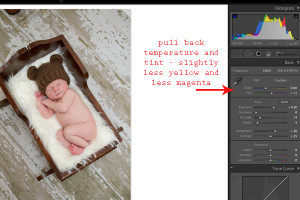
Next, I adjust the white balance a tad until the skin tone is right. This makes the image slightly cooler and less magenta – read: the skin color less orange and pink. Newborn skin tones can be tricky, especially if they have a touch of jaundice. Trust your eye, and if necessary, come back to the photo after youʼve left it alone for a bit and can look at it again “fresh.”
Step 3 – Spot Removal
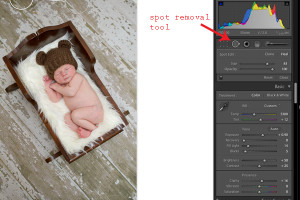
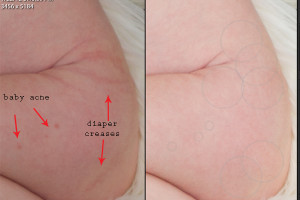
Newborn skin tends to have lots of little blotchy patches, acne, peeling, etc, so the spot removal tool is your best friend. This baby boy happened to have amazing skin, so he only needed a few touch ups. I set the tool to ʻhealʼ and try to keep the spot as small as necessary to remove the imperfection. Sometimes you have to play with it a bit to get the skin to look right, and itʼs easy to move the circle to a different place to find a spot that makes the most natural looking replacement for the blemish. Here, Iʼve had to remove some red spots from the face and body, as well as the marks his diaper left around his bottom. I also used the tool in two of the corners of the photo – dadʼs shoe in the upper left and my real floor peeking out in the bottom left.
Step 4 – Skin Smoothing
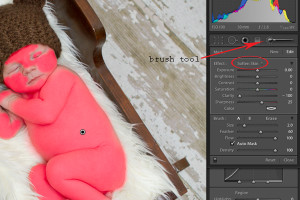
Since we want a newbornʼs skin to look as creamy and smooth as possible (without looking plastic), the next step is to select the brush tool. Then, from the drop-down menu, select ʻSoften Skinʼ and begin painting over the areas of skin you want to even out. I add more clarity in images where the skin begins to look unnatural, but in this case I left it at -100. The red shows you exactly where youʼve made changes with the paint brush.
Step 5 – Contrast
Instead of adding contrast in the “Basic” tools section, I scroll down to the “Tone Curveʼ section where I can control these elements more precisely. For this photo, I added +17 to the highlights, +24 to the lights, and decreased the shadows by -19.
Step 6 – Crop
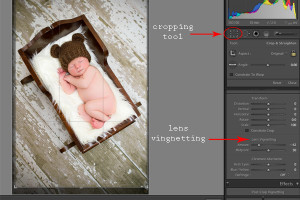
I select the cropping tool and adjust the photo slightly so that the crib is closer to centered. Lastly, I add a subtle vignette (-62) to highlight the subject.
That’s it! Here’s the before and after photos side by side:
